이펙트아카데미 특강/외주/커뮤니티
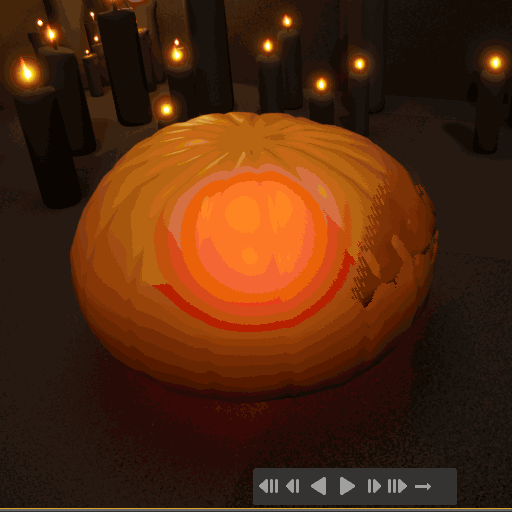
 언리얼4 - 호박 폭발 이펙트 참고 및 노드예제
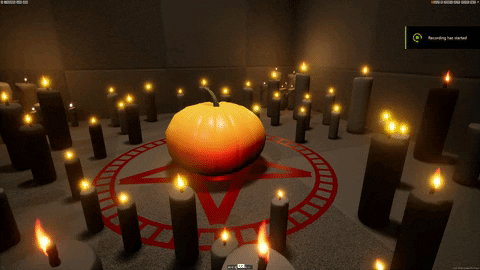
최종
초안
I merged the two splats into one big one in the corner, I want to make a big primary one first and then I’ll add smaller ones later. Also added some drops that I hooked up to a blueprint so I can spawn some spots when they collide, I’ll make some textures for those too at some point
Gonna work on what causes the explosion to happen in the first place this weekend, a demon being summoned into it
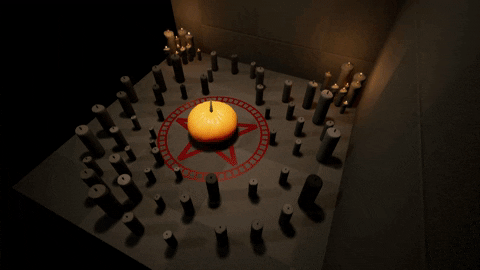
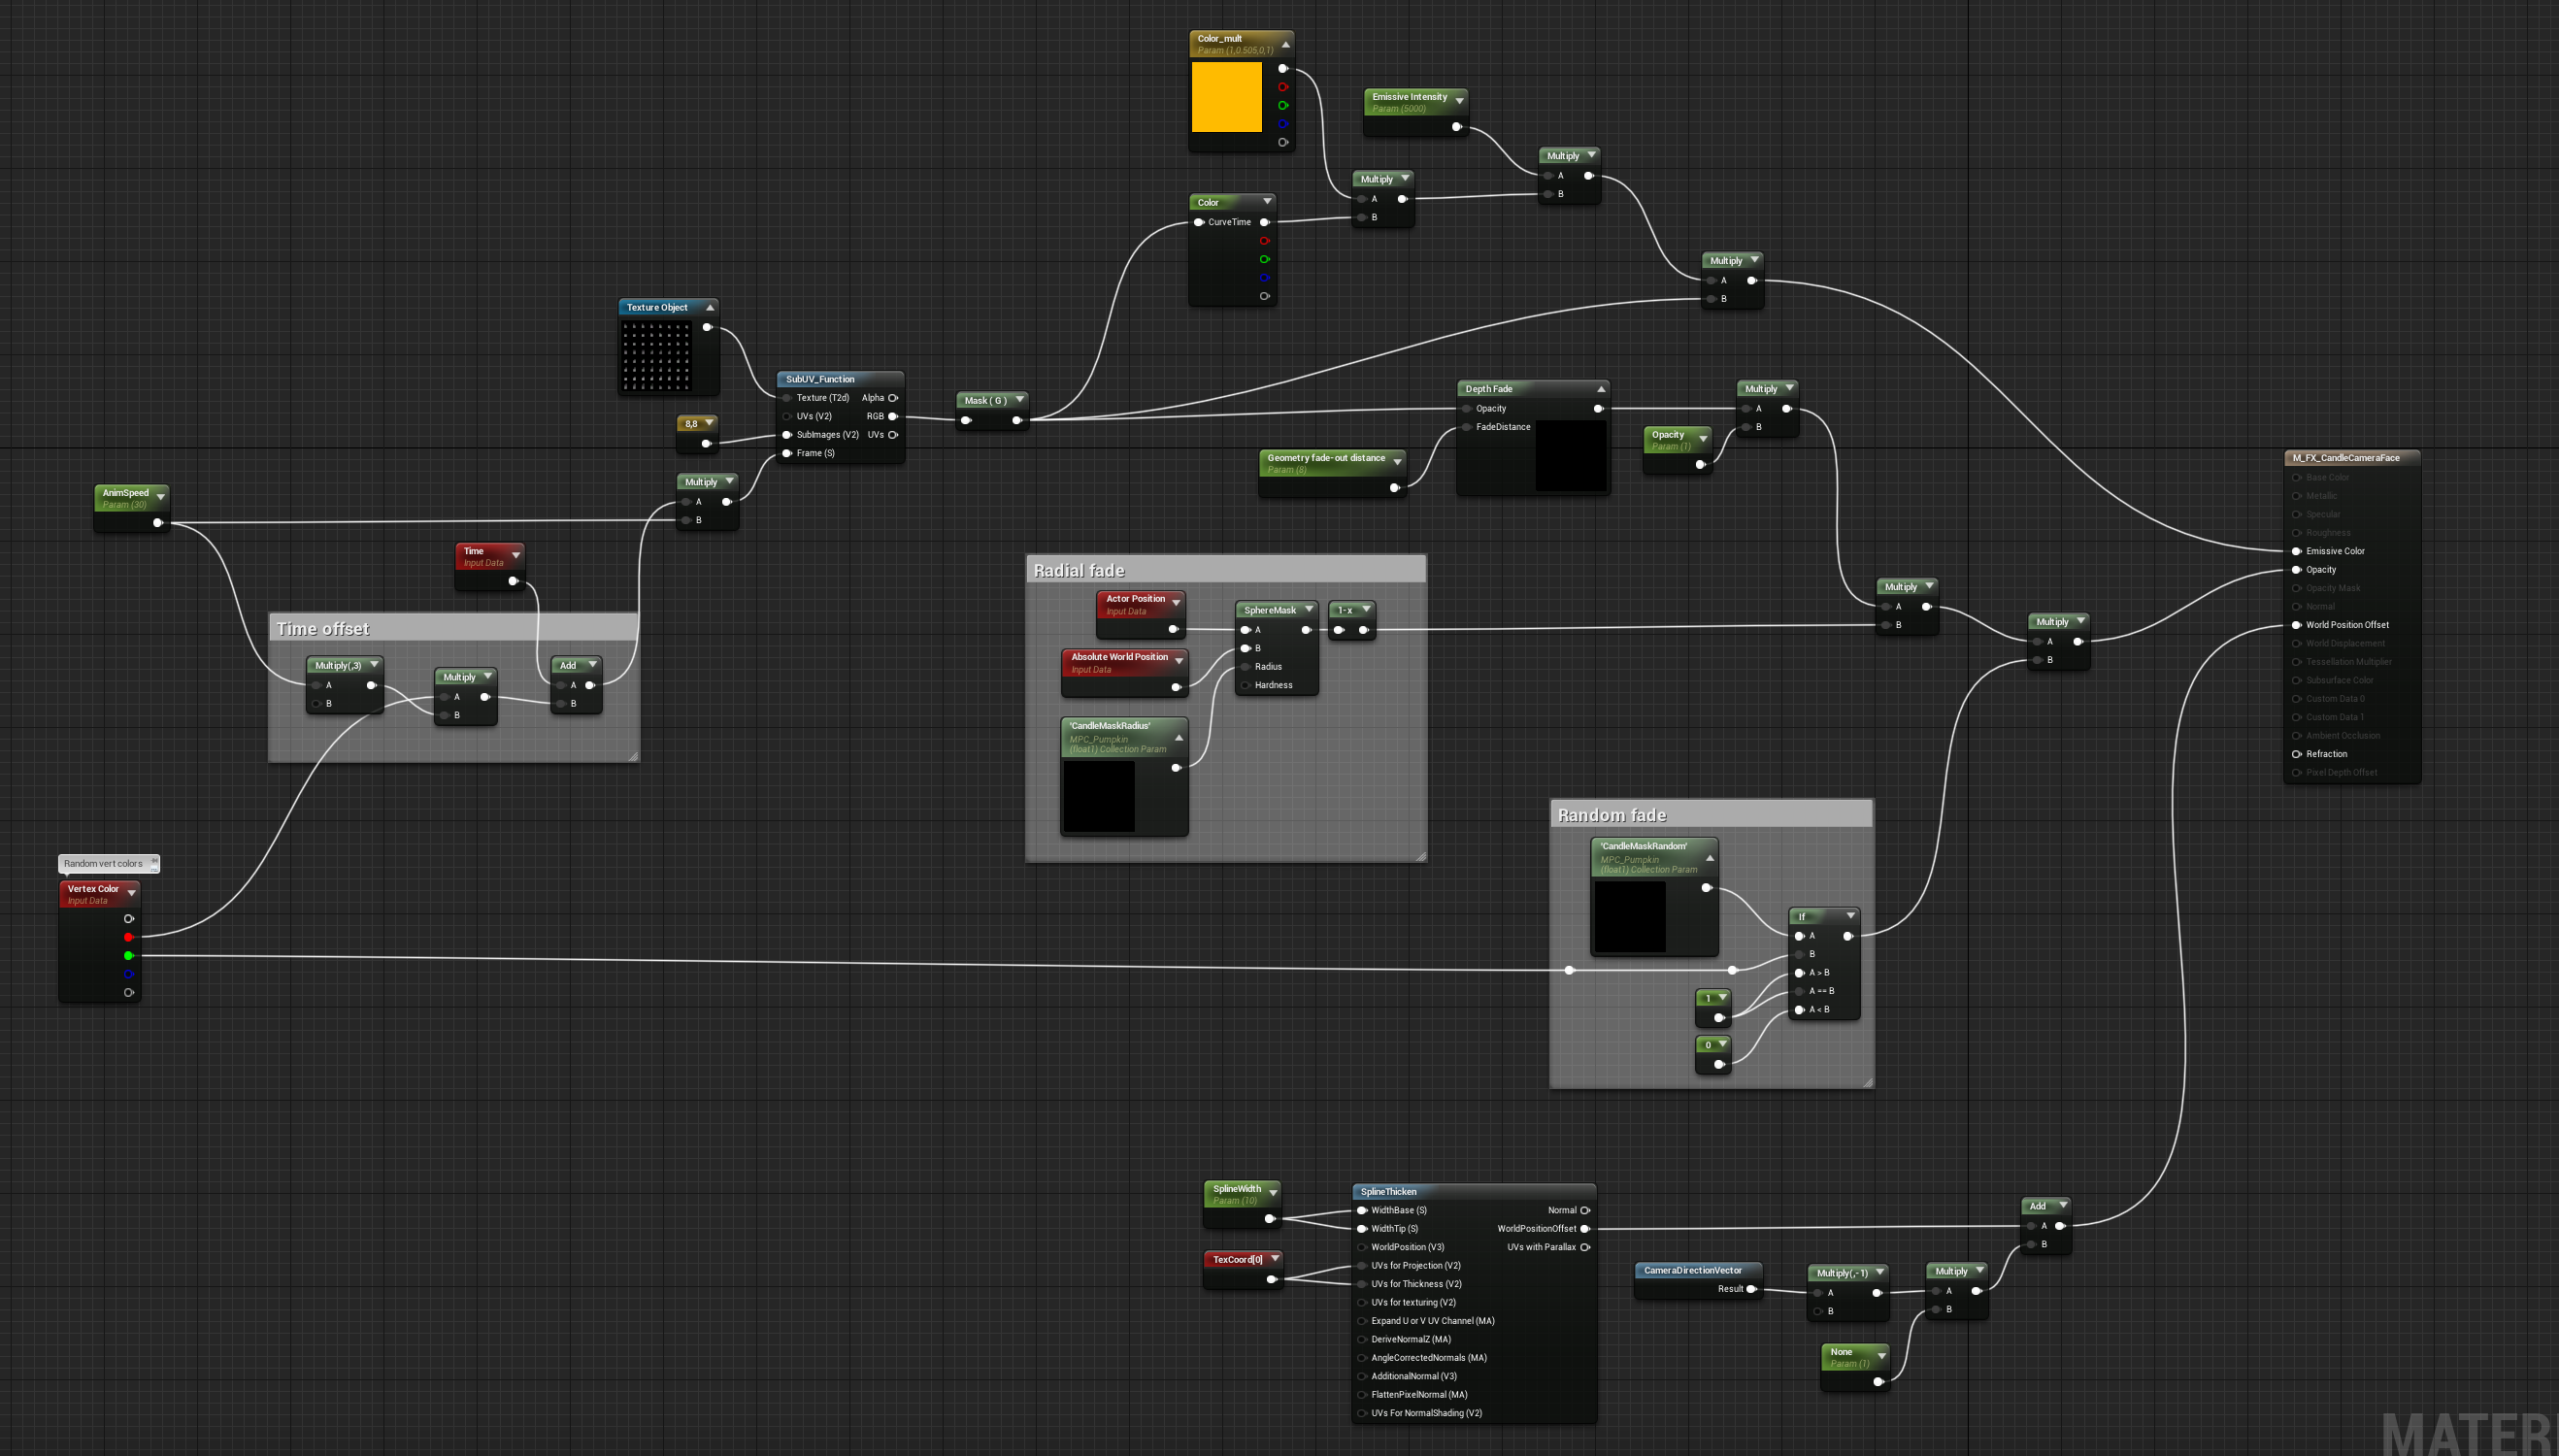
Added some more candles all around and gave them two parameters in the shader that I can control in sequencer, one randomly fades out the different flames using vertex color and the other does it radially using a sphere mask. They’re using the spline thicken function to face the camera and a color curve to define how they look. Here’s the shader.
Thinking of animating the face that appears on the pumpkin, or maybe putting a classic cartoon ghost on a soulcoaster from the candles to the pumpkin. Also still not sure yet how I’ll make the inner chunks of the explosion, not sure if eroding sprites will be okay or if I should go for a meshed solution.
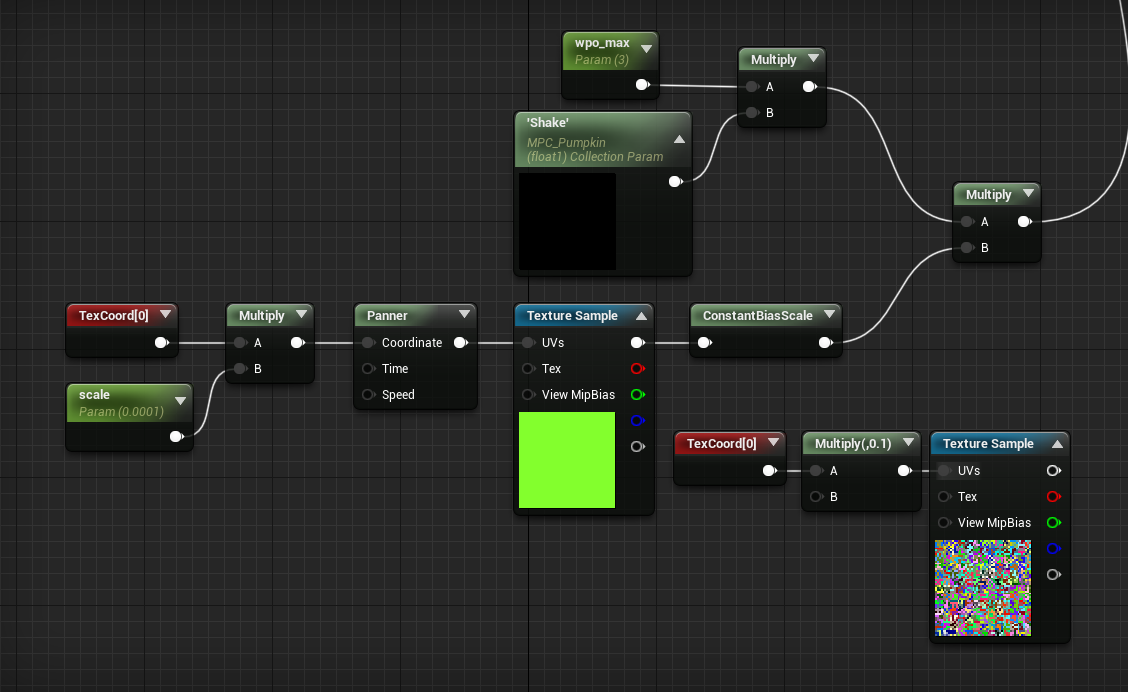
The candles were easy to do with the shader I posted, for the random fade I increased the equal threshold in the if statement and put my scalar there. The radial one I did with a second sphere mask that’s slightly bigger then the one making them fade. For the shake I made a quick 3 channel noise texture, scaled it super big in the shader and pan it quickly over the whole object.
I’ve been working on a cooler way of doing the pumpkin’s face based on an idea I had and a suggestion from a colleague. In houdini I bend the mesh and bool out a mouth hole, then convert the whole thing to a vertex anim. Also added an inner sphere that bends in the same way, making some simple stretching tendrils
However, I’m having trouble hiding the rough normals created by the bool, making the swap real easy to see. I tried various ways of hardering, softening and different mesh generation but everything looks the same or worse. If anyone has a hot tip of fixing these I’d appreciate it!
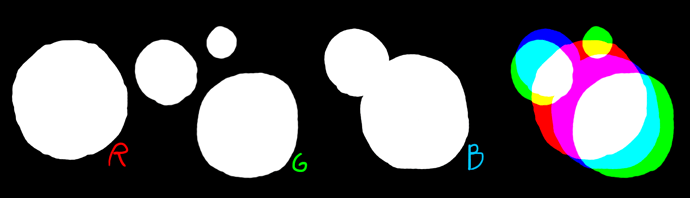
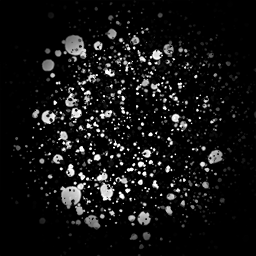
Added more shapes of drop particles and stringy ones. Quickly made the drop textures in photoshop, one texture is packed so I can easily spawn some different shapes, the other is more dense with smaller spots. The dense one really helps with adding some volume to the center of the explosion.
I’m using a dither to fade between a static pumpkin and the deforming one. I animate a gradient along one axis and enabled the masked opacity dither in the material, that gives you a dither-style fade out for values between 0-1 on opague materials. The pop is less noticeable but you can see the transition still. Haven’t found a way yet to totally fix the normals on the morphin pumpkin, maybe if I make sure both pumpkins look exactly the same aside from the mouth the fade-out will be good enough.
My plan for this week is to finish all the bits I definitely want in the final effect, better destruction sim, some candles falling over and lots of goopy bits on the floor and ceiling. Then I want to spend the last week polishing as much as possible
So I think I was able to get most of the stuff I wanted in there, smoother mesh swaps between the static, morphing and RBD pumpkin. The candles now fall over as well, I had to find a way to place the flames that didn’t involve dragging 50 particle systems around, so I ended up spawning them in the center of each candle, shifting them up and raycasting them back down on there in a blueprint. The wood material is from the unreal starter content.
Made a nicer material for the fluid VAT with some world position based UVs and fresnel. Got some more varying colors in there, without flux this time :stuck_out_tongue: Also made some splatter textures for the floors and walls I might still polish, didn’t have a lot of time to spend on them.
I tweaked the keys I was already using for the face erode anim to make it laugh, gives it some more personality and it helps with building anticipation too. I used only the top half as the source of the destruction sim and left the bottom half on the floor, wiggled it a bit in the shader after the explosion so it doesn’t look as static.
Pretty sure I’ll leave it at this content-wise, I might still add some fluid bits flying out of the pumpkin’s mouth when it opens. Otherwise I’m just gonna polish the bits that are there already
Here’s a vid of me stepping through the mesh generation of the pumpkin, the final result is exported as a vertex animation texture.
I’d like to get better at sharing my process, do you guys like this format of showing off how a mesh was made? Or do you want it to be a step by step in real-time?
Let me know if there’s anything I haven’t shared and you are interested in

I thought it might be nice to talk about the stringy particles I made, since I think they turned out pretty decent and were very easy to make!
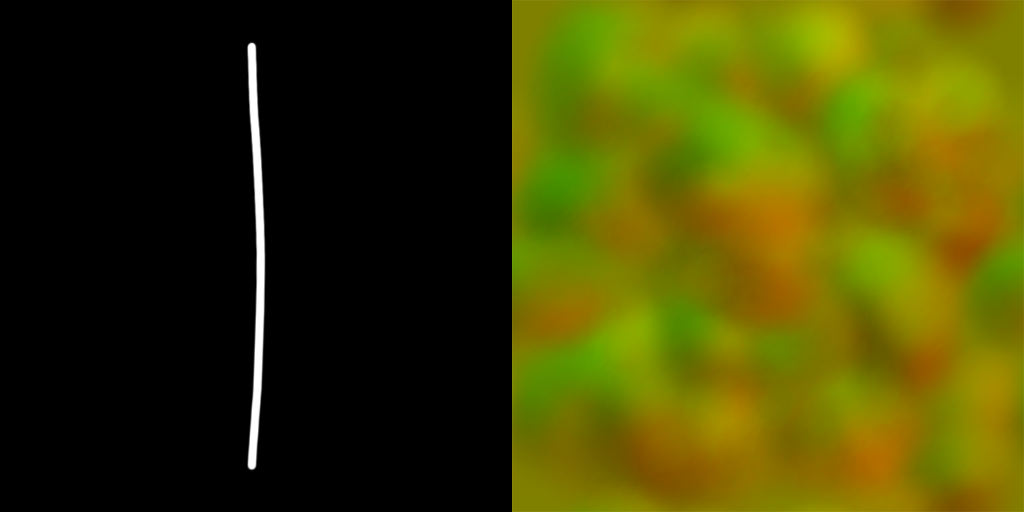
It’s two simple textures, one line I drew and a swirly flowmap I made in flowmap painter. You have to make sure the line texture is set to clamp so it doesn’t wrap around and then I randomize the distortion using a parameter in the particle system
최종
I added some effects for the mouth being burned in, thought they looked cool and they distract a bit from the mesh swap. Did some tweaks to the explosion, like adding delayed drops falling from the top of the screen. Redid some of the shading and texturing to give the candles and magic symbol on the floor a bit more character. Then when I had all the components together I retimed everything so it flows well.
I’m happy to share more if people are interested, I might even come back to try some other ideas I had. For now I have to call it though since I won’t be able to use my PC for a while.
Comments