이펙트아카데미 특강/외주/커뮤니티
 유니티 쉐이더 팁 - 유령 트레일효과 SIN WAVE TRAIL
It was done with just a particle system, and it is particle mesh render within trail component. The issue of the effect is how to create three different swing trail on a single plane.
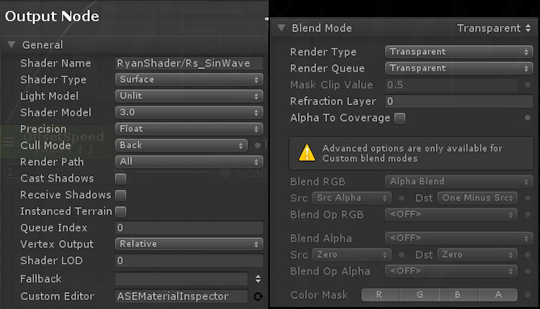
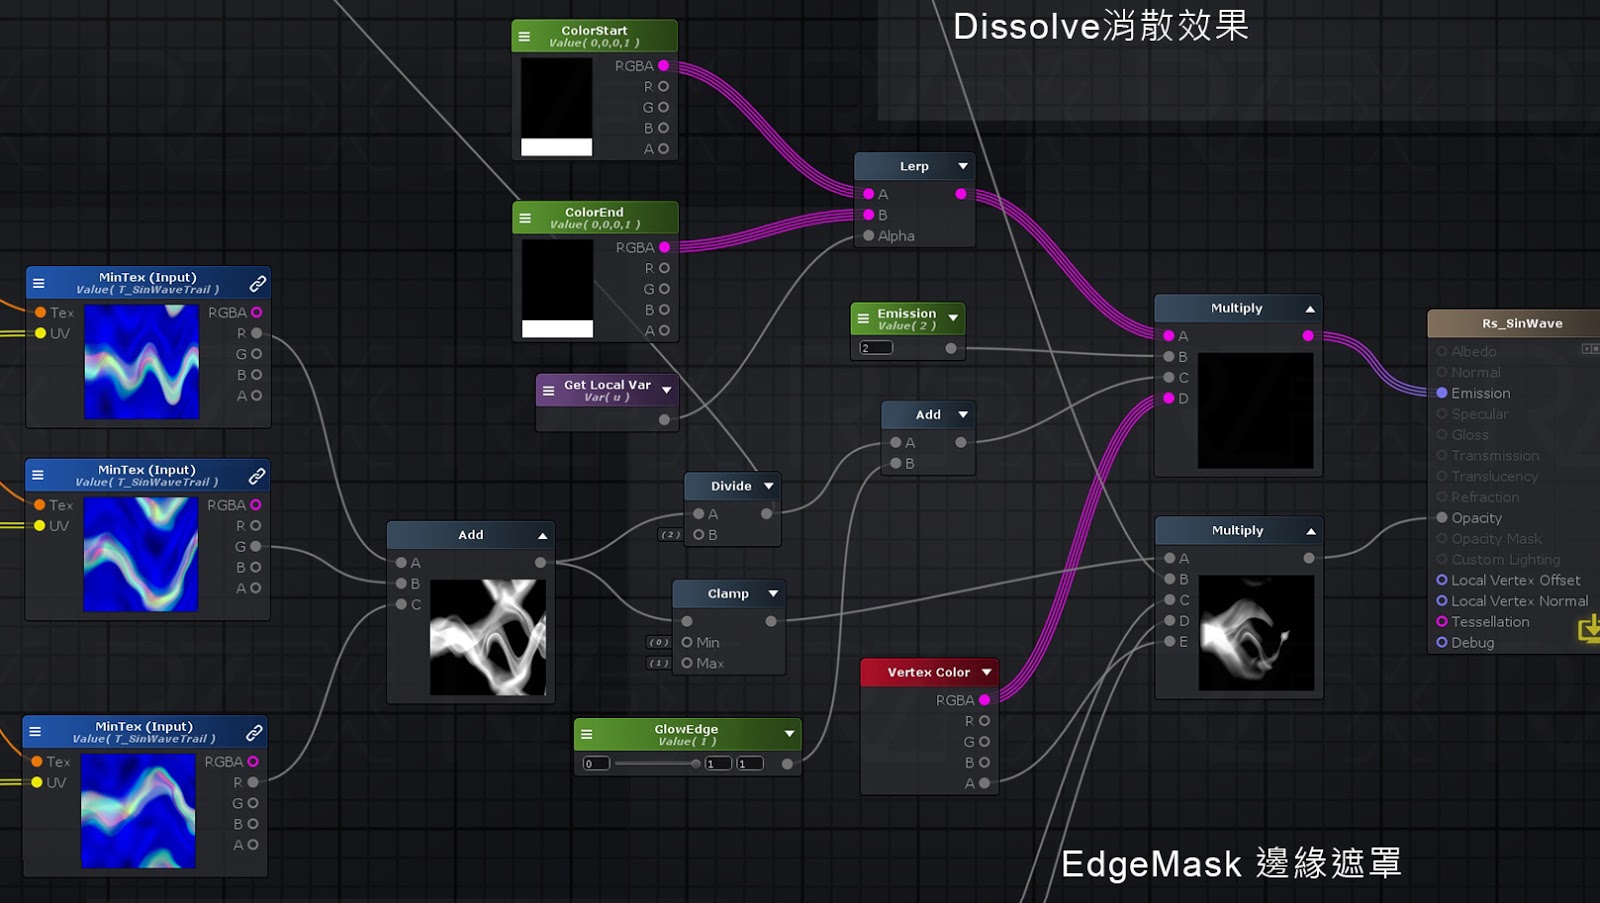
The shader is made by Amplify shader editor 1.5.8. It also could do it with shader graph in Unity. 大圖Full Size
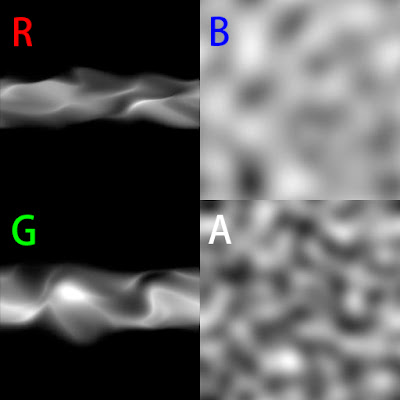
Texture made by Substance designer 2018
R: for trail 1.
G: for trail 2.
B: the noise of distortion.
A: the noise for dissolve. 大圖Full Size

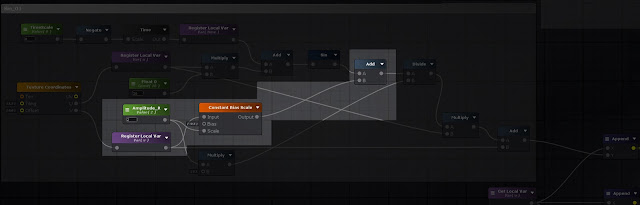
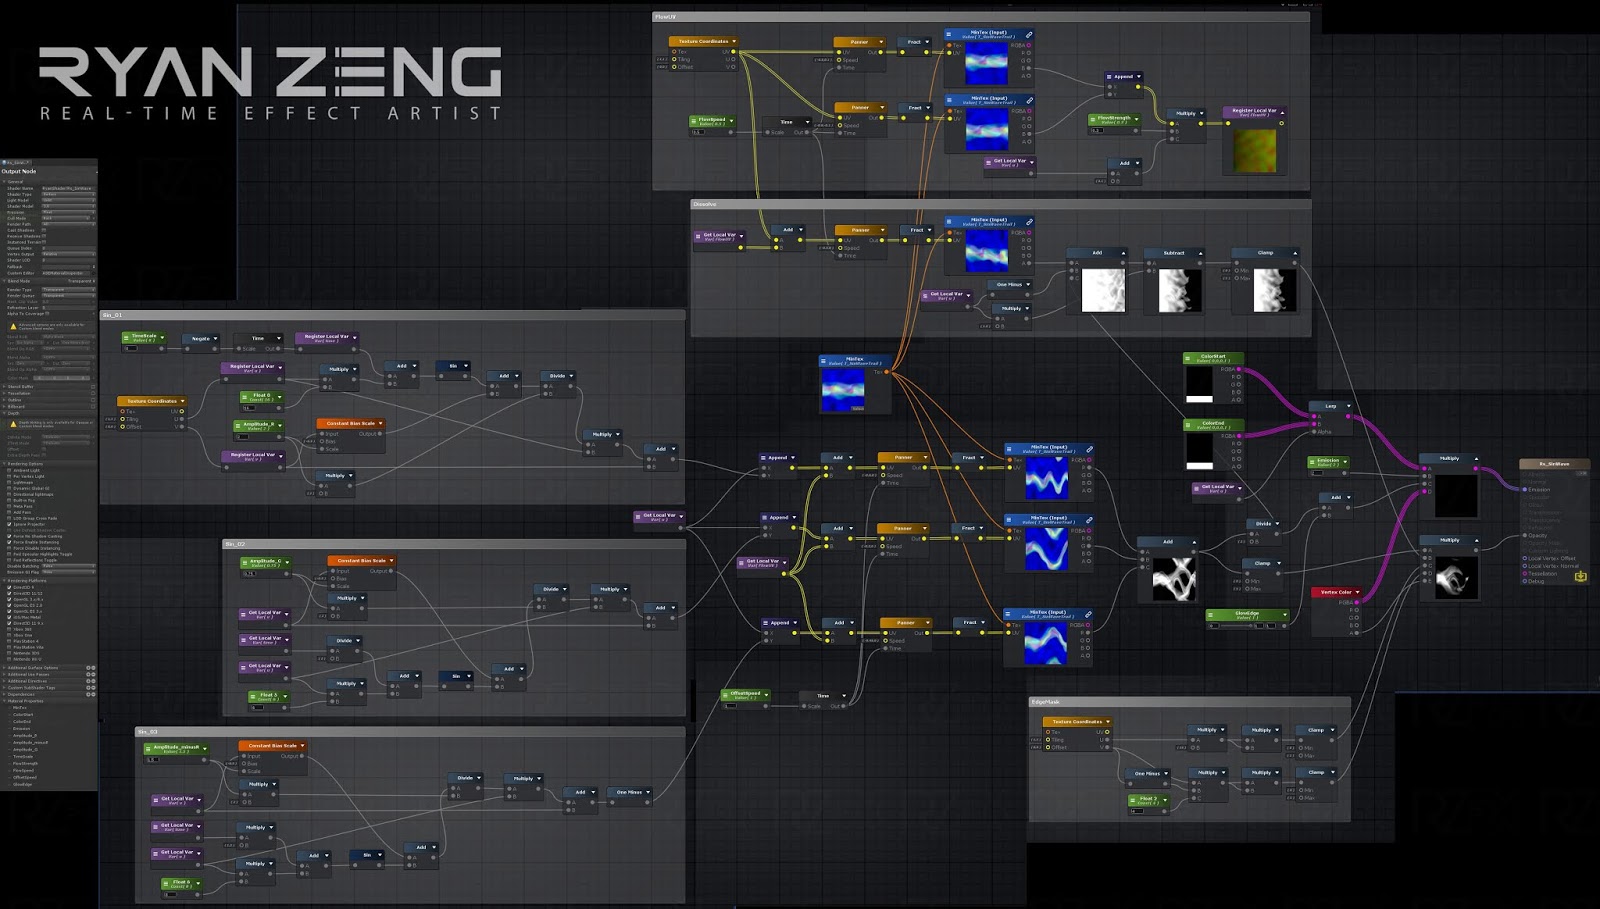
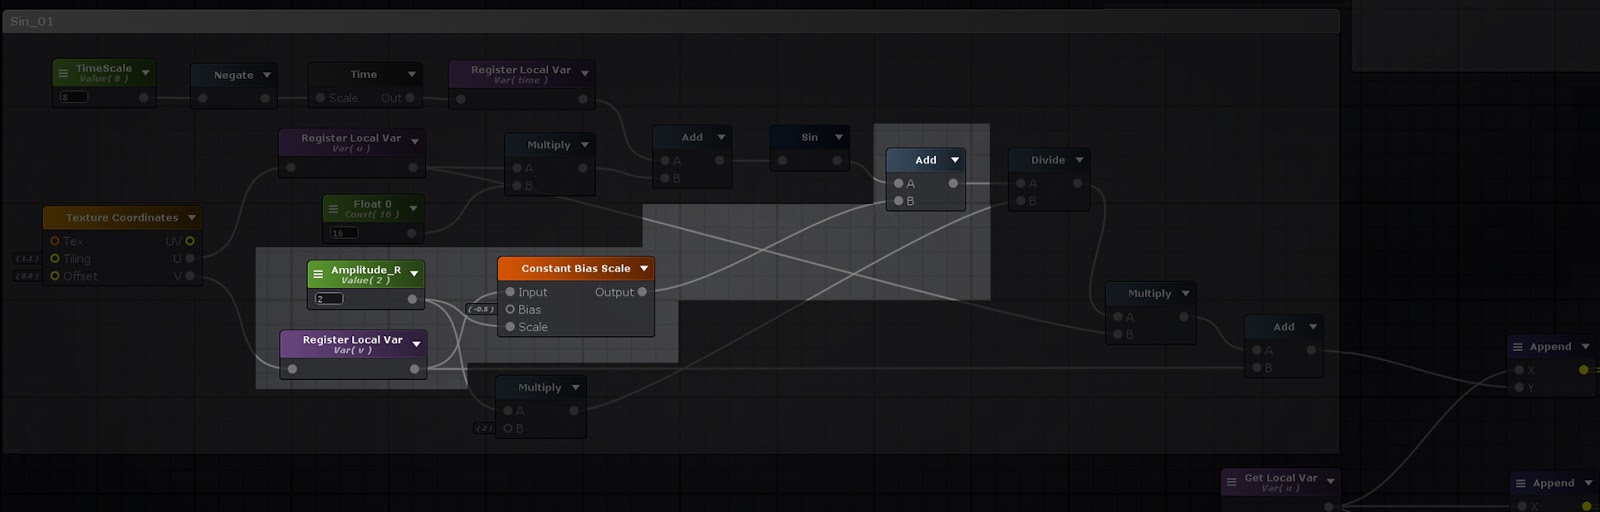
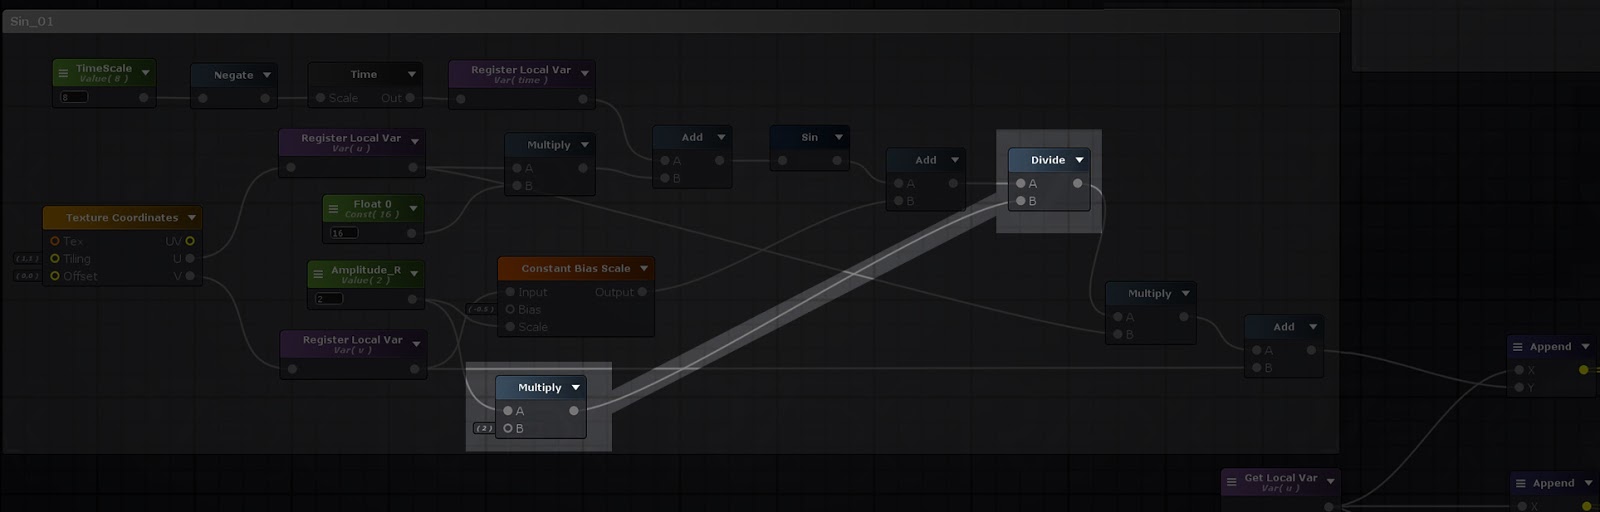
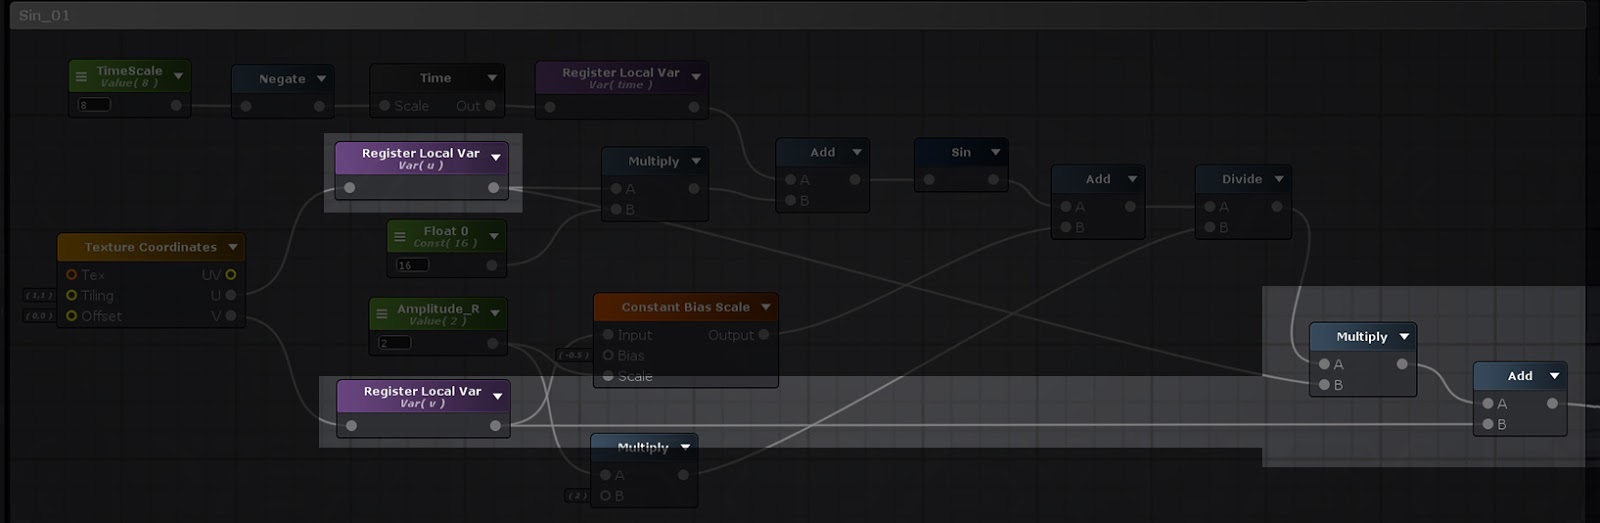
Shader Breakdown of shader
1.基礎Shader屬性設定 Setting property

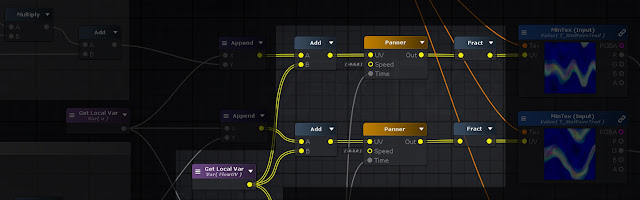
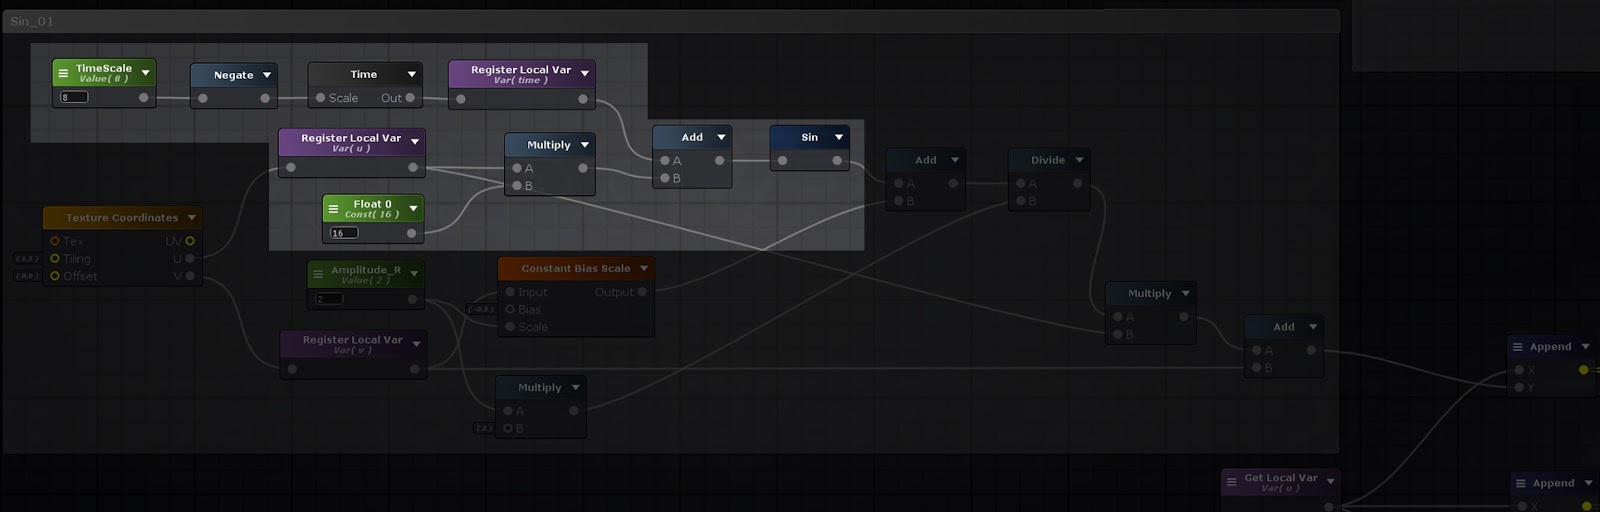
2.Shader大圖中Sin01的區塊為擺動UV的產生,Sin02及03僅是重複01計算後,改變其波長頻率時間等來製作三種不同擺幅 。
The Sin01 block is working for the motion of V coordinate. Sin02 and Sin03 block are just duplicate it, and modify the value of wavelength, amplitude and time to do the variety of motion.
a. First, create the sin node and add with time.
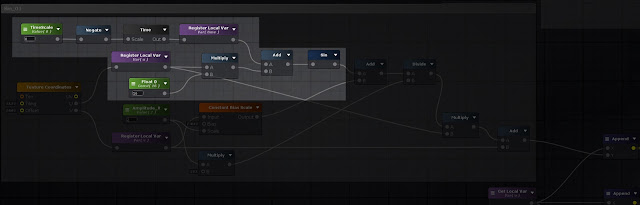
b. V coordinate remap to 1~ -1, and then add to Sin. You can fin the Sin wave animation.
c. As the result, value goes to be more than one. It has to remap to 1~ -1.
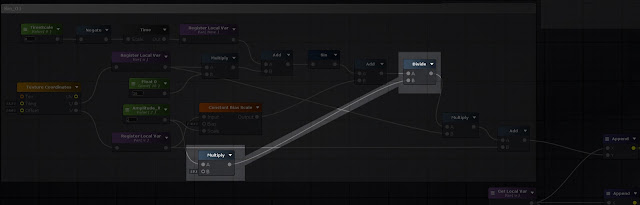
d. Multiply U coordinate to increase the swing animation from left to right (0~1) and add to the origin V coordinate.
e. Append swing V and origin U to get the swing UV for trail map.
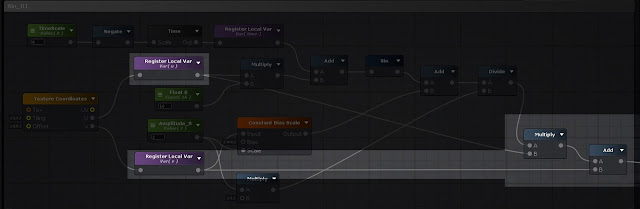
3. In order to make the trail animation to be more variety, need to add some distortion into UV. The Flow UV block work with two motion from B channel of texture and multiply the parameter value to control the strength of distortion. Multiply U coordinate to keep shape in the start position (left) and more distortion to end (right).

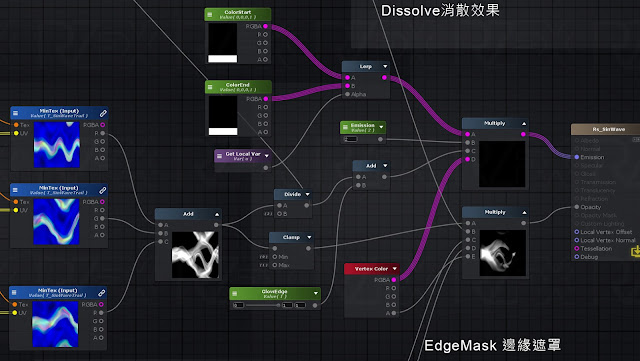
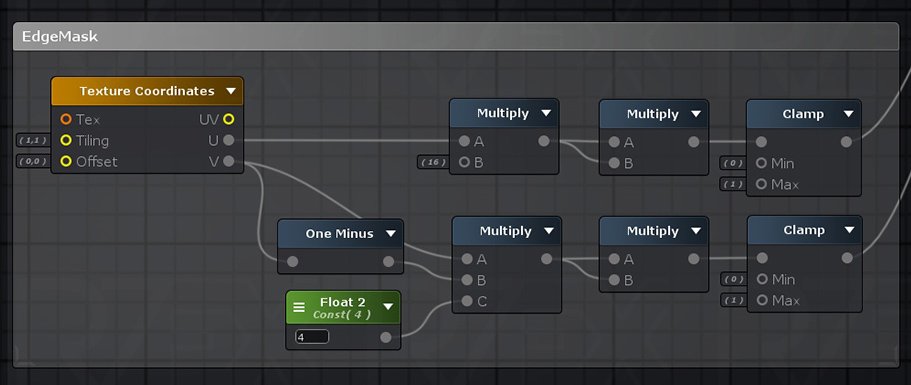
4. Create the edge mask within UV coordinate to clean the shape animation over the edge.

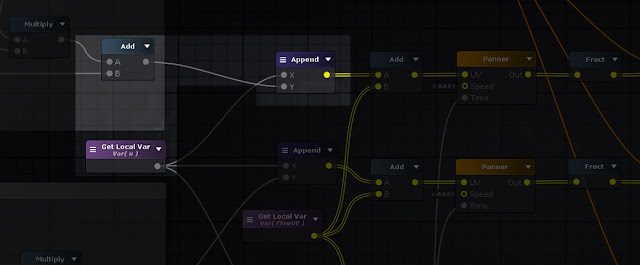
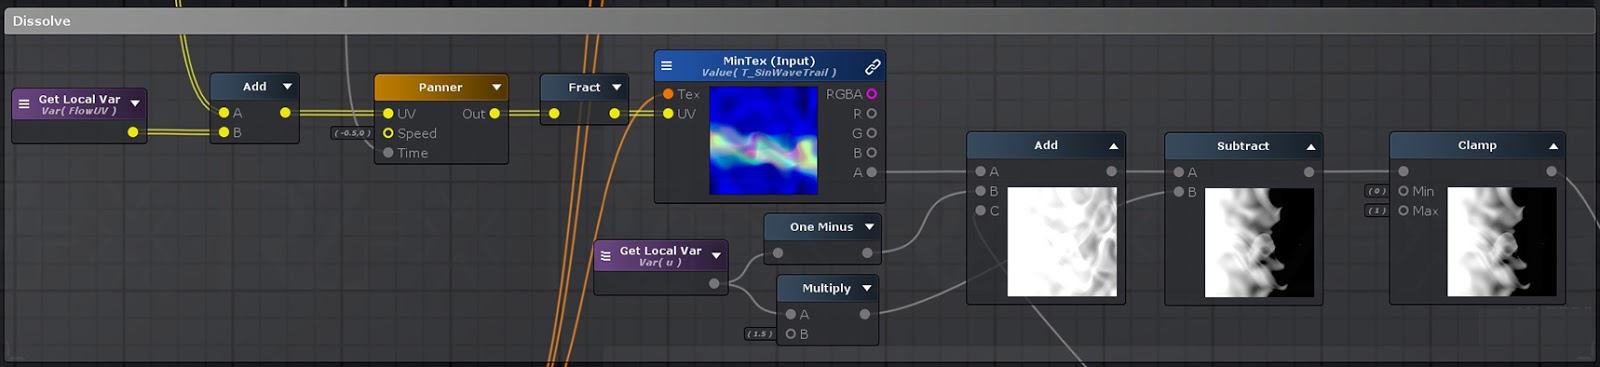
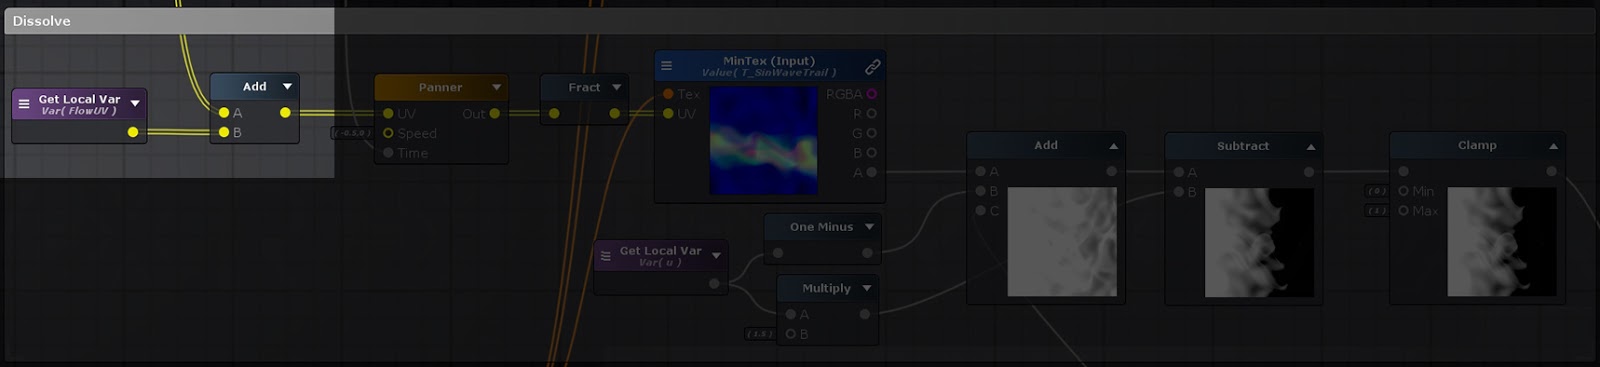
5. Dissolve block is doing the dissolve in the end of trail.

a. Add Flow UV to make it naturally.
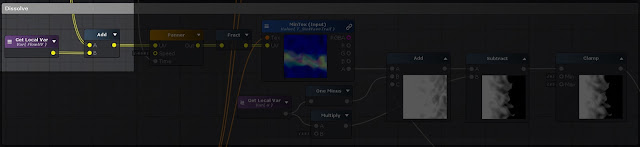
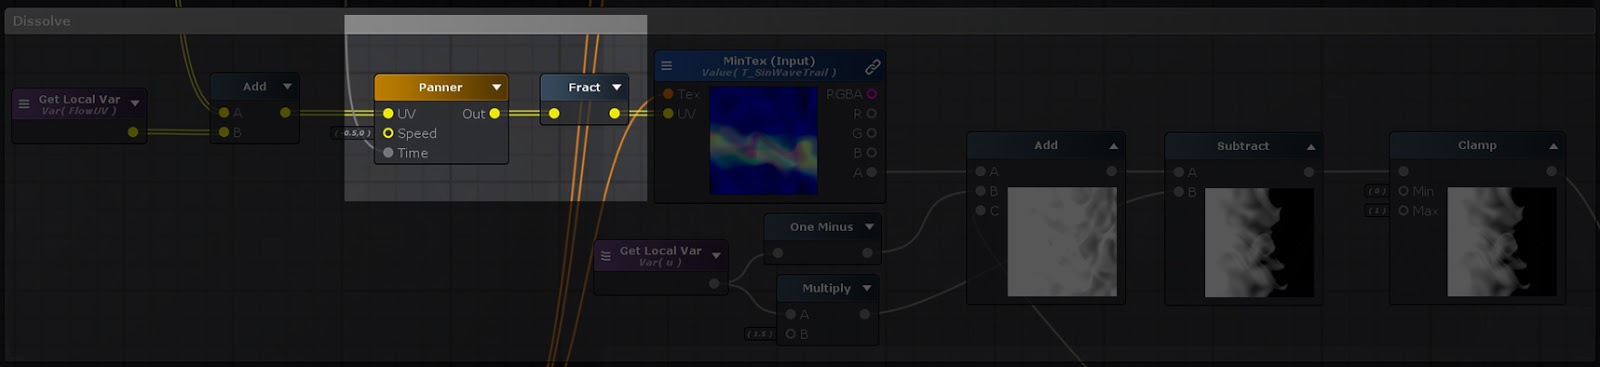
b. To add frac node, it will let the value from 0~1, even it is going to be huge from time. But the texture have to be seamless. In this way, it could maintain the motion value and some performance.
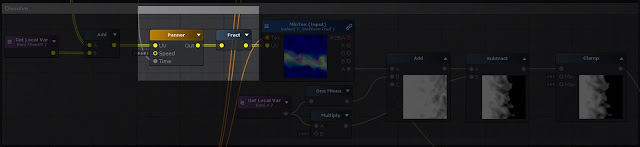
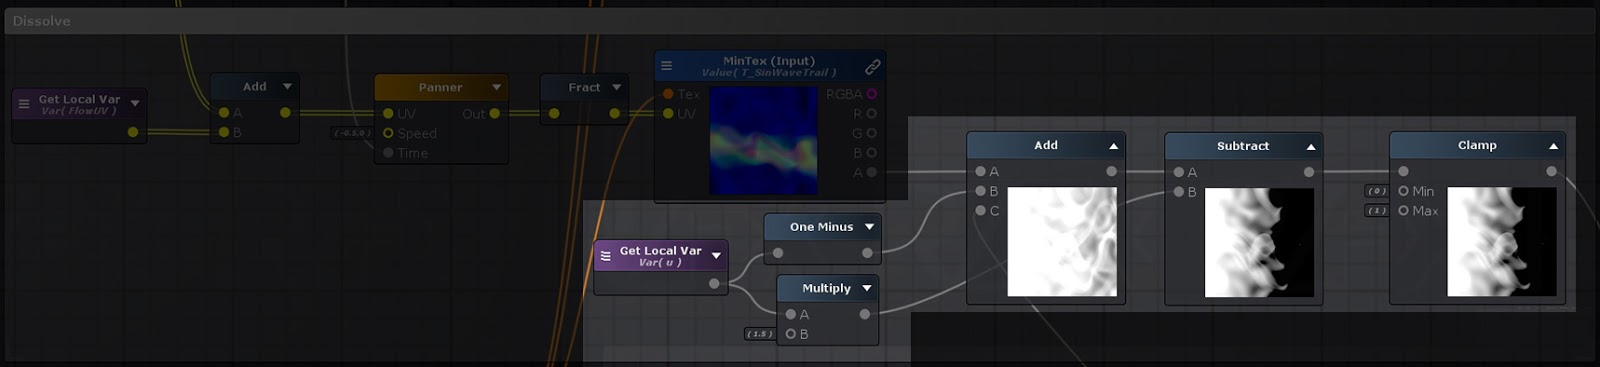
c. Modify the ramp (0~1) to increase effect of dissolve.
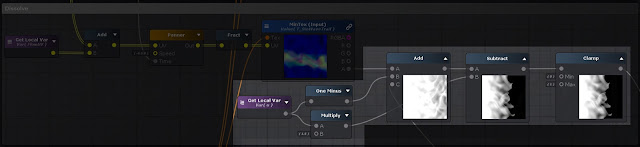
6. Lerp within U coordinate to create two color from start (left) to end (right).
Shader的部分就到此完成
Done
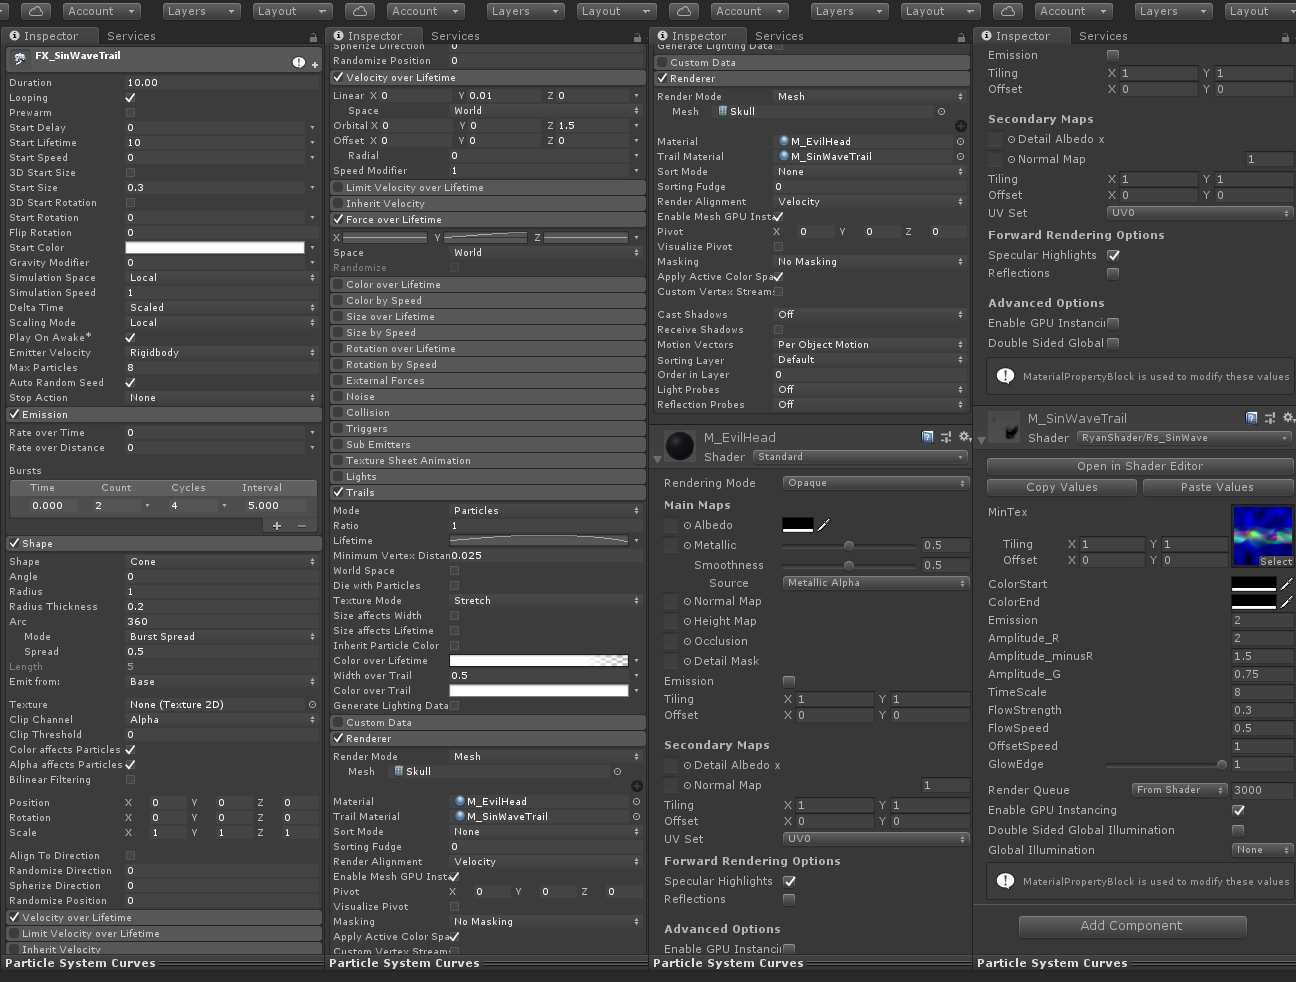
粒子系統設置 particle setting
The render is mesh particle and add the trail component. You can find the detail setting in the below picture.


It is the breakdown of the Sin Wave effect.

Comments