이펙트아카데미 특강/외주/커뮤니티
 유니티 - Custom Vertex Stream and Shadergraph/Amplify Shader
Since few weeks, I saw many questions about ’ Custom Vertex Stream ’ (called CVS here) on Shuriken with Shadergraph/Amplify Shader
First, here a really good post about CVS by Mirza Beig where a lot of things are explains : http://www.mirzabeig.com/tutorials/intro-to-custom-particle-vertex-streams/ 102
I will only tacle how to link CVS and Shadergraph/Amplify Shader!
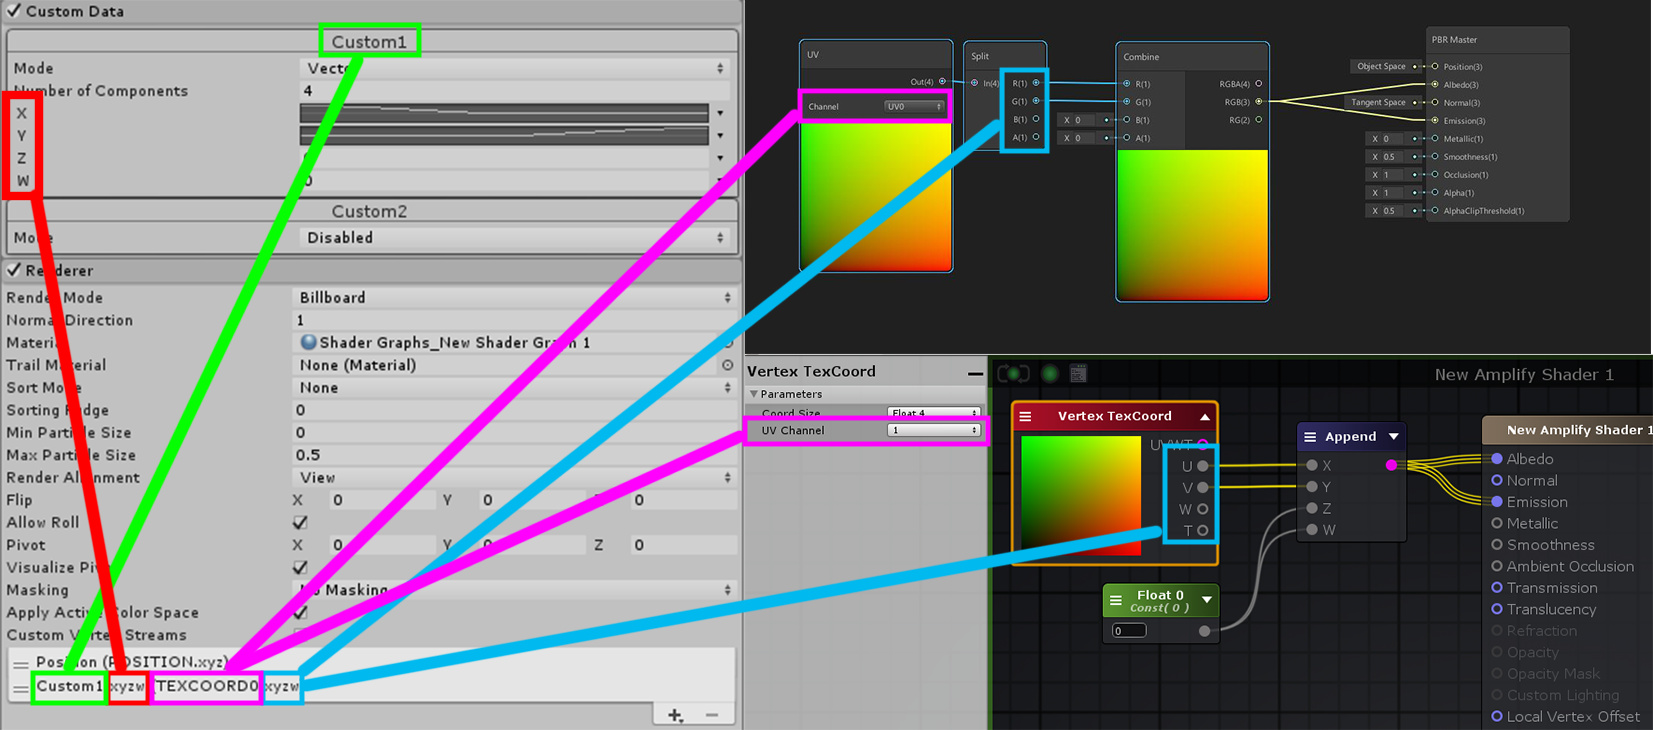
Here the shader we will use for Shadergraph:

And here the shader we will use for Amplify Shader:
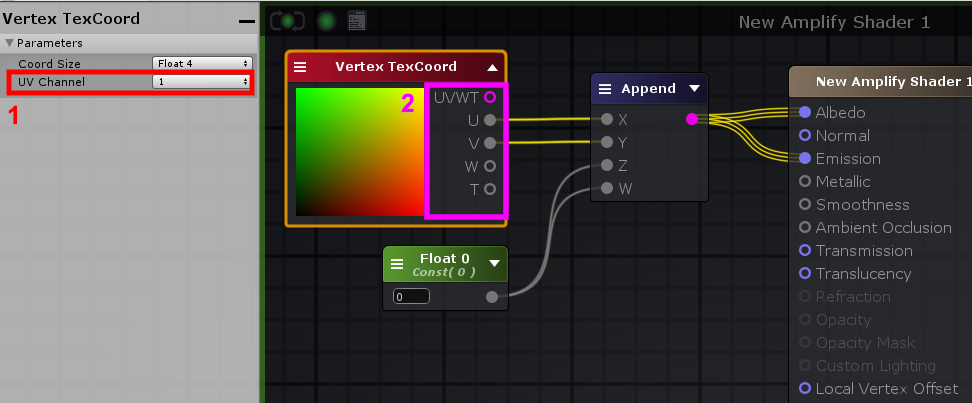
1: UV channel selector, the first important part in the shader
2: RGBA split component, the second important part!
The only difference between the two shadernode editors is the uv channel:
Shadergraph starts at 0
Amplify starts at 1
Let’s go to Shuriken now ! We add a new material with the shader we created in Shuriken renderer.
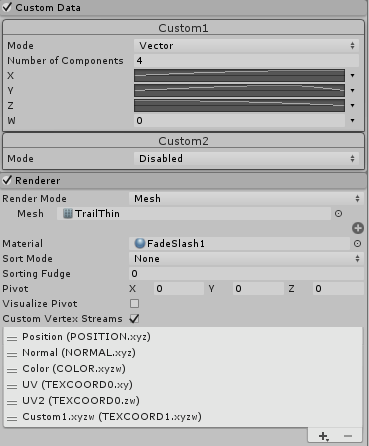
The setup is the simpliest as possible, only one particle and only the one ’ Custom Data ’ in CVS (we can’t delete the Position!)
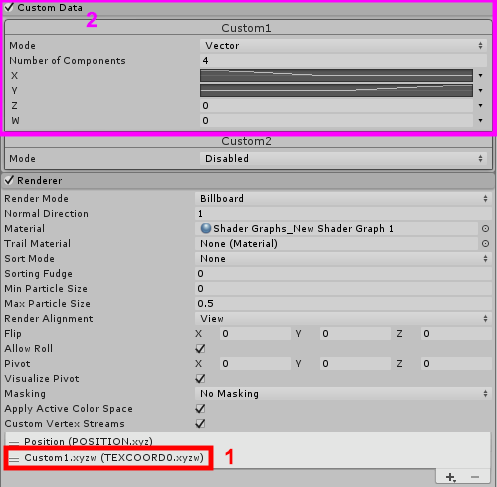
1: Enable CVS and add a Custom1.xyzw data
2: Enable ’ Custom Data ’ module, set the Custom1 to Vector and 4 component
Custom1 is setup like that:
X : Start at 1 and decrease to 0 at midlife
Y : Start at 0 and at midlife go to 1
Z : Const 0
W : Const 0
And here the result you should have:
Let’s describe a bit what happens!
CVS and Custom Data :
- It’s simple, the Custom1 in CVS is the Custom1 in Custom data. You can animate here the XYZW component with const, curve or color.
CVS and Shadergraph/Amplify :
- Near Custom1 in CVS, we can see Unity give us a tip on how to link that in Shadergraph/Amplify with (TEXCOORD0.xyzw). TEXCOORD is our UV channel and the 0 say it’s our first UV channel.
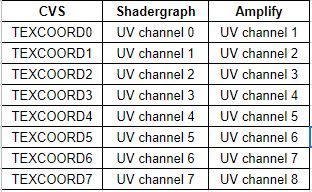
We can resume with this array
But what if we have more data to send ? Our best friend become the number near TEXCOORD
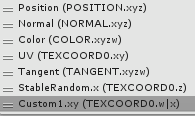
Here a case :
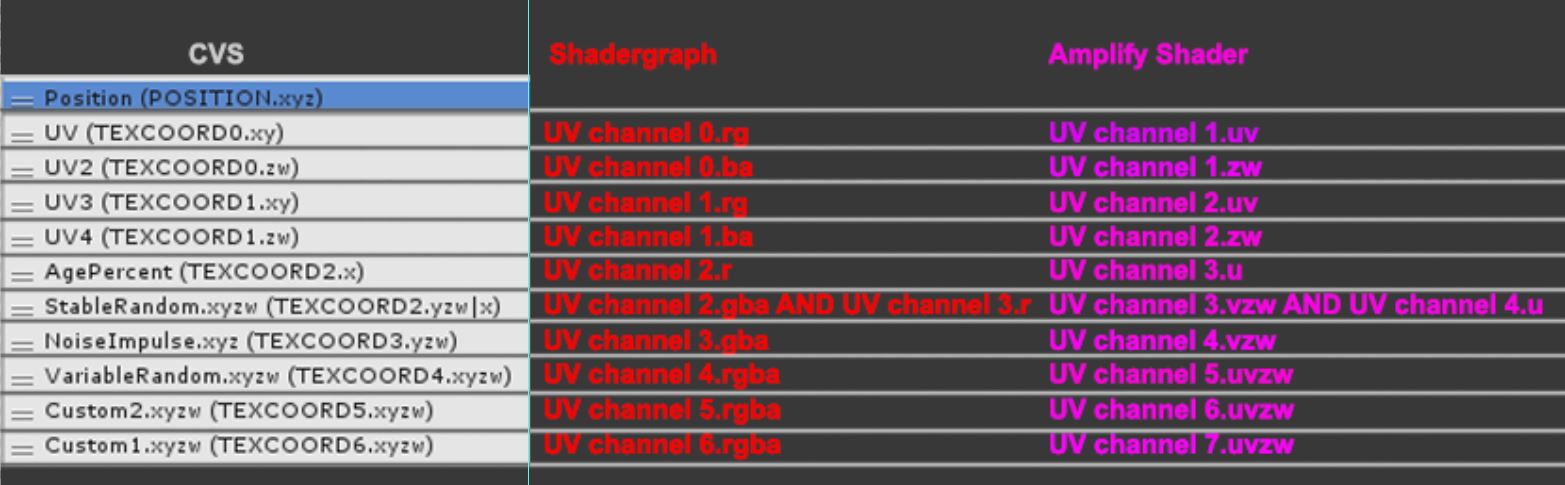
In resume we have:
- TEXCOORDX = UV channel X for Shadergraph and UV channel X+1 for Amplify.
- XYZW = RGBA for Shadergraph and UVWT for Amplify
One particular thing we see with StableRandom.xyzw is the TEXCOORD2.yzw**|**x
Unity wants to say us ’ StableRandom.xyzw starts in TEXCOORD2.yzw and finishes in the next one,TEXCOORD3.x ’
And here we go! We can now make crazy SHEBAM ! POW ! BLOP ! WIIIZZ !
I hope this can help, forgive me my language mistakes, don’t hesitate to correct me to make this a bit clearer or add/remove/correct any informations!
Another User example
Using this feature you can make texture panning from curve x if you have UV output Z(W in amplify). It will be one curve for your Z value and panning. I don’t know where you can use it, but anyway…
or you can make random texture coordinates using StableRandom

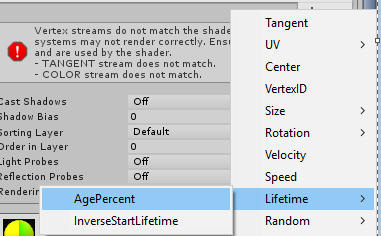
Tangent need when you use normal map in the shader.
Put like on this comment if you found out about it for the first time
One simple way is setting your colors as HDR in shadergraph
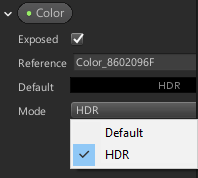
and use AgePercent to Lerp between the color
The only counterpart is if you want 4 different colors over the particule life, you will have to declare 4 colors :
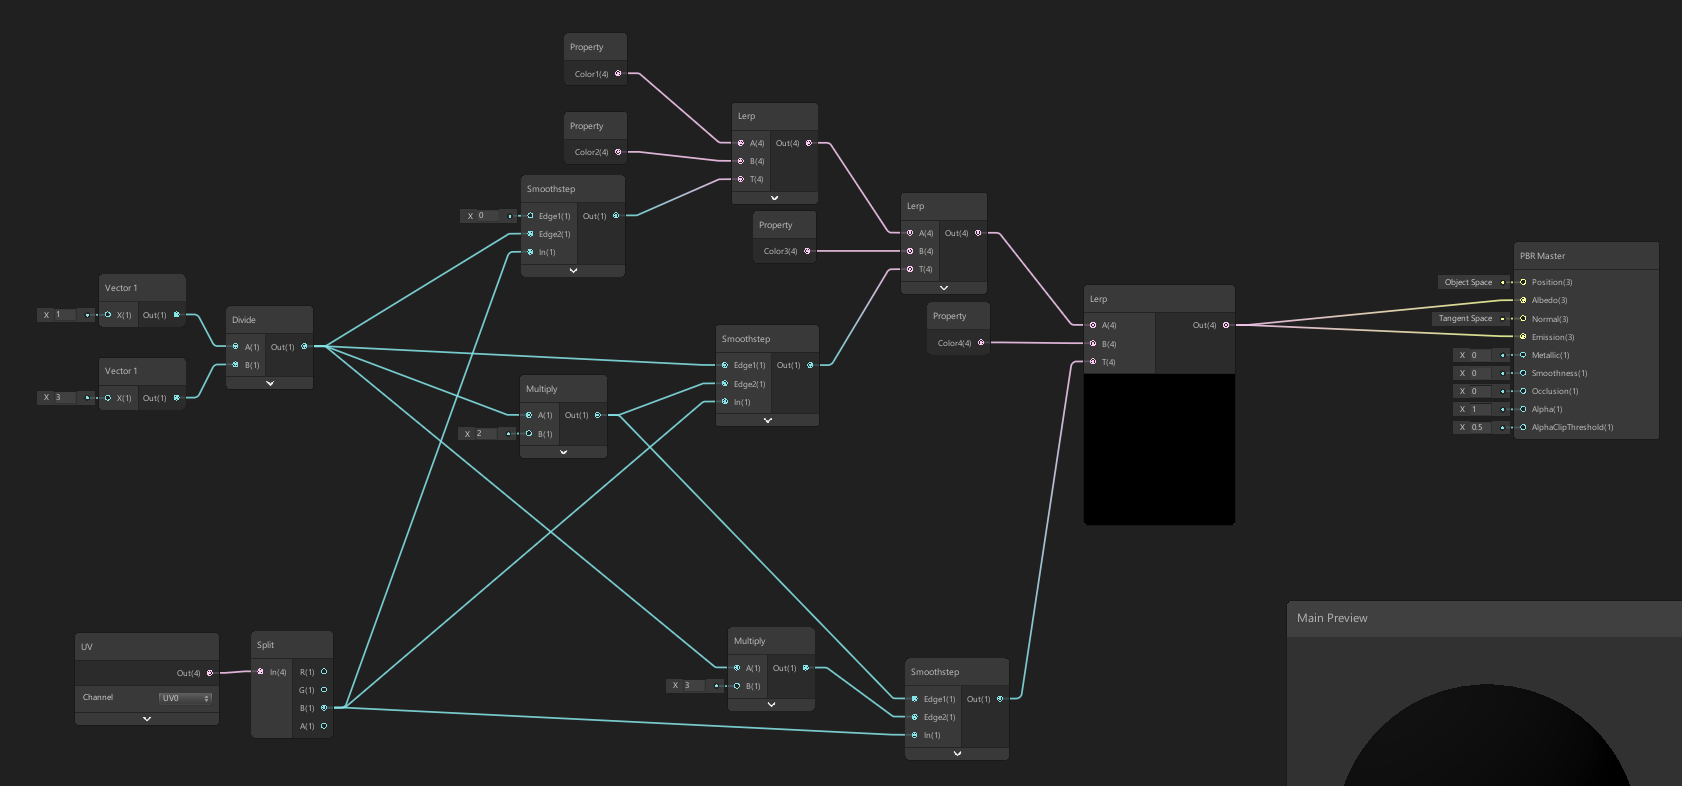
Here the result :
In few words, each smoothstep provide a [0-1] value to lerp between the different colors.
The smoothstep range is define by [1 / 3 (numberOfSmoothstep)]
- for the first one you have [0 => 0.33]
- the seconde one : [0.33 => 0.33 * 2]
- the last one : [0.33 * 2 => 0.33 * 3]
I hope it’s what you’re looking for in a way!
And here the shader for example (you can see the setup for shuriken in the gif). Sorry, i don’t know how to add commentary in shadergraph… and it’s look like it’s impossible for the moment!
https://drive.google.com/file/d/19oafzIyZIg3qzvszjFwKc0z7ZHYOiPUZ/view
If someone have a simplier solution to have HDR color over lifetime, you must speak! now!
Comments